
How to Set Up DynamoDB Local for Local Development
It's common to spin up a local development stack that mirrors your cloud environment — developers can verify changes instantly with minimal impact. For stacks that use DynamoDB, DynamoDB Local is the fastest way to get started. It gives you a local endpoint that behaves like DynamoDB for everyday development tasks such as table creation, item writes, PartiQL experiments, and integration tests.
This guide focuses only on setup. If you want to query and manage local tables with a GUI afterward, see Access and Manage Local DynamoDB with DocKit.
What You Need Before Starting
Pick one setup path:
- Docker with dynamodb-local image — easiest for most developers
- Downloadable JAR — useful if you do not want Docker
You may also want:
- AWS CLI for creating and listing tables from the terminal
- DocKit if you want a desktop GUI for local DynamoDB
AWS currently recommends DynamoDB Local v3.x for local development, and the downloadable versions require Java 17 or newer for recent releases.
Option 1: Run DynamoDB Local with Docker
This is the simplest setup for most teams.
Start the container
docker run -d \
  --name dynamodb-local \
  -p 8000:8000 \
  amazon/dynamodb-local:latest
This starts DynamoDB Local on:
http://localhost:8000Check that it is running
aws dynamodb list-tables --endpoint-url http://localhost:8000If everything is working, you should get a valid JSON response.
Persist data with Docker Compose
If you want your local tables to survive container restarts, mount a local directory and use -sharedDb -dbPath ./data.
services:
  dynamodb-local:
    command: "-jar DynamoDBLocal.jar -sharedDb -dbPath ./data"
    image: "amazon/dynamodb-local:latest"
    container_name: dynamodb-local
    ports:
      - "8000:8000"
    volumes:
      - "./docker/dynamodb:/home/dynamodblocal/data"
    working_dir: /home/dynamodblocal
Then start it with:
docker compose up -dOption 2: Run DynamoDB Local with the Downloadable JAR
If you prefer not to use Docker, you can download the JAR and run the server on your machine.
Download and extract
mkdir -p ~/dynamodb-local
cd ~/dynamodb-local

curl -L -o dynamodb_local_latest.tar.gz \
  https://d1ni2b6xgvw0s0.cloudfront.net/v2.x/dynamodb_local_latest.tar.gz

tar -xzf dynamodb_local_latest.tar.gz
Start DynamoDB Local
java -Djava.library.path=./DynamoDBLocal_lib \
  -jar DynamoDBLocal.jar \
  -sharedDb
By default, DynamoDB Local listens on port 8000. If you need another port:
java -Djava.library.path=./DynamoDBLocal_lib \
  -jar DynamoDBLocal.jar \
  -sharedDb \
  -port 8001
If you want to see all runtime options:
java -Djava.library.path=./DynamoDBLocal_lib -jar DynamoDBLocal.jar -helpConfigure AWS CLI for DynamoDB Local
After a DynamoDB server runs on your local machine, you will need some tools to access it. You can use either the AWS CLI or DocKit. Even though DynamoDB Local does not require real AWS credentials, the AWS CLI still expects credentials and a region to be configured.
Use any placeholder values:
aws configureExample values:
AWS Access Key ID: fakeMyKeyId
AWS Secret Access Key: fakeSecretAccessKey
Default region name: us-east-1
Default output format: json
For every local command, remember to pass:
--endpoint-url http://localhost:8000Create Your First Local Table
Once the local server is running, create a simple table.
aws dynamodb create-table \
  --table-name Users \
  --attribute-definitions AttributeName=userId,AttributeType=S \
  --key-schema AttributeName=userId,KeyType=HASH \
  --billing-mode PAY_PER_REQUEST \
  --endpoint-url http://localhost:8000
Then confirm it exists:
# list tables
aws dynamodb list-tables --endpoint-url http://localhost:8000
# Describe specified table
aws dynamodb describe-table \
--table-name Users \
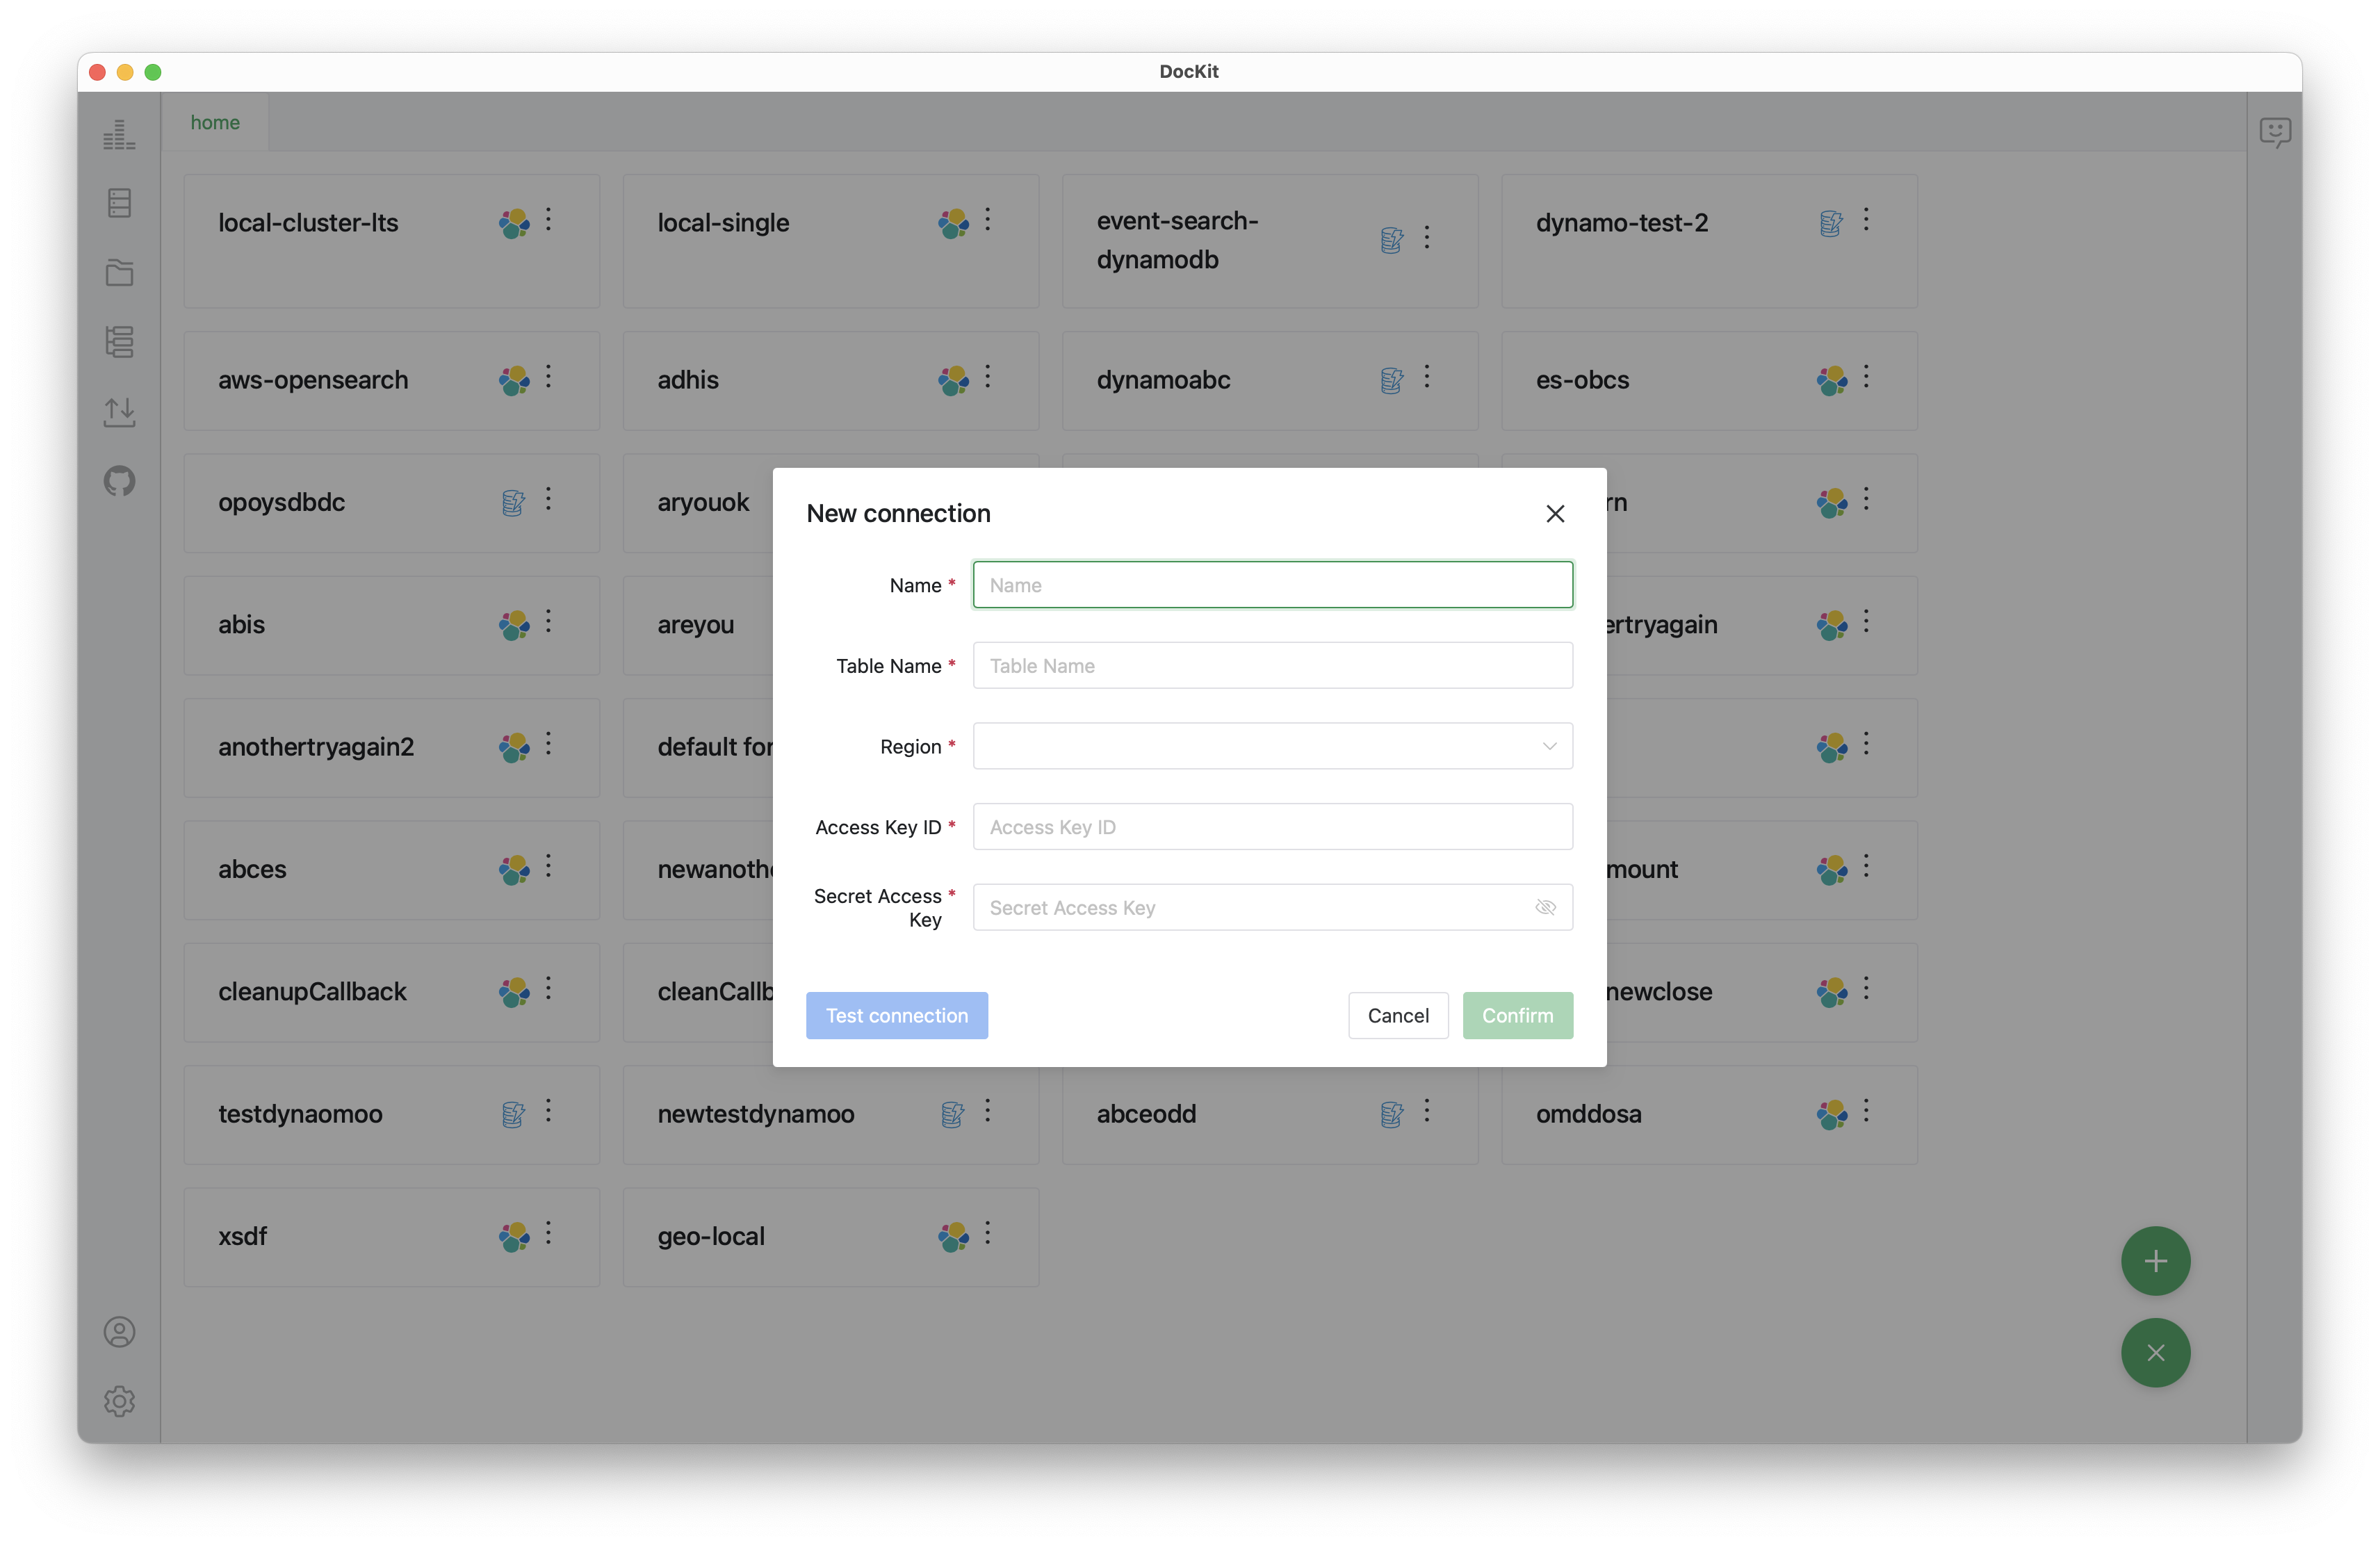
--endpoint-url http://localhost:8000Connect DynamoDB Local from DocKit
The CLI works, but remembering --endpoint-url on every command gets tedious fast. DocKit connects directly — point it at http://localhost:8000 and you can browse tables, run PartiQL, and inspect data without typing a single flag. For everything you can do once connected, see Access and Manage Local DynamoDB with DocKit.
Tips & Troubleshooting
Always use --endpoint-url — without it, CLI commands hit real AWS instead of your local instance.
Fake credentials are fine — DynamoDB Local accepts any value. Run aws configure with placeholders if the CLI complains.
Port 8000 already in use? Start on a different port:
docker run -d --name dynamodb-local -p 8001:8000 amazon/dynamodb-local:latestUse -sharedDb to store everything in a single database file instead of separate files per credential/region.
Data doesn't survive a restart by default — mount a volume and pass -dbPath ./data to persist across sessions.
Set a region — even locally, most SDKs and the CLI expect something. us-east-1 works fine.
Prefer a GUI? Use DocKit to browse tables, run PartiQL, and inspect data visually. Point it at http://localhost:8000 — same as the CLI.
Learn More
- Access and Manage Local DynamoDB with DocKit
- Managing your DynamoDB tables with DocKit make life easier
- Download DocKit
Last updated: April 2026